Introduction to Cement Tiling
Cement tiling is a significant aspect of the construction and renovation industry, serving as a foundational component for both residential and commercial projects. Proper tile installation using cement not only enhances the aesthetic appeal of the space but also contributes to its structural integrity and longevity. In this blog post, we will delve into the common mistakes made when using cement for tiling and provide practical solutions to avoid them.
Understanding the intricacies of cement tiling is essential for achieving a seamless, durable finish. The process involves meticulous planning, precise execution, and a keen eye for detail. Mistakes can compromise the quality of the tiling job, leading to issues such as tiles coming loose, uneven surfaces, and accelerated wear and tear. Therefore, recognizing and avoiding these errors is crucial for both professionals and DIY enthusiasts.
Our discussion will cover a range of topics, including the importance of surface preparation, the proper mixing and application of cement, and the significance of choosing the right type of cement for the specific tiling project. We will highlight the need for adequate curing times and the common pitfalls that can arise during the curing process. Additionally, we will explore the impact of environmental factors, such as temperature and humidity, on cement performance.
By the end of this blog post, readers will be equipped with the knowledge to identify and rectify common issues associated with cement tiling. Whether you are embarking on a new construction project or renovating an existing space, understanding these key principles will help ensure a successful outcome, enhancing both the durability and appearance of your tiling work.
Incorrect Cement Mixing Ratios
Achieving the correct cement-to-water mixture is crucial to the success of any tiling project. Utilizing improper cement mixing ratios can significantly impact the integrity and durability of your tiles. When the proportions are incorrect, you risk weak bonding material that is prone to cracking and eventual failure. To create a strong and reliable adhesive, it is essential to follow precise measurements and mixing techniques.
Start by gathering the necessary tools: a mixing bucket, a trowel, a measuring jug for water, and a scale for cement. The recommended cement-to-water ratio often specified by manufacturers ensures optimal bonding strength and consistency. Generally, a standard guideline is to mix cement and water in a 4:1 ratio, though it’s best to follow specific instructions provided on the cement packaging.
Begin by filling your mixing bucket with the appropriate amount of water based on the mixture ratio. Next, slowly add the cement into the water, not the other way around. This method helps prevent clumping and ensures an even mixture. Use a trowel to mix the cement and water thoroughly, ensuring that the mixture is smooth and free of lumps. The consistency should resemble that of thick peanut butter, allowing proper application without running or sagging.
In the event of an improperly mixed batch, you can sometimes correct the mixture by slowly integrating small amounts of either cement or water, depending on the deficiency. For a mixture that is too thin, gradually add more cement until the desired consistency is reached. If the mixture is too thick, incrementally add water to adjust.
Adjusting your mixing techniques and strictly following the recommended ratios can drastically improve the outcome of your tiling project. Adopting these precise methods promotes robust adhesion and lessens the likelihood of tile failure, providing a durable and visually pleasing finish.
Poor Surface Preparation
Surface preparation is a pivotal step in ensuring the success of any tiling project, yet it is often overlooked or inadequately conducted. One of the most common mistakes in tiling is neglecting to properly clean the surface before installation. Dirt, grease, and other contaminants can significantly impede the adhesion of tiles, resulting in a compromised bond that may lead to future issues like tile lifting or cracking. Ensuring a clean, debris-free surface is indispensable for effective tile adhesion.
Another frequent error is the failure to level the substrate. Uneven surfaces can cause tiles to crack under stress or become misaligned over time. Whether dealing with concrete, wood, or drywall, it is essential to verify and correct any surface irregularities. This can often be achieved through the use of a leveling compound, which should be allowed to cure fully before proceeding with tiling.
Ignoring structural problems is another critical misstep. Any gaps, cracks, or weaknesses in the underlying surface can lead to significant issues down the road. Concrete surfaces, for example, should be examined for cracks or spalling and repaired before the application of tiles. Similarly, wooden substrates need to be scrutinized for rotting or warping timbers, which must be replaced or reinforced as required.
Best practices for surface preparation vary based on the material in question. For concrete surfaces, thorough cleaning followed by the application of a primer specifically designed for concrete can enhance adhesion. Wooden surfaces, on the other hand, should be sealed to prevent moisture ingress, which can weaken the adhesive bond over time. Drywall requires careful treatment as well; a primer is recommended to prevent moisture from the adhesive impacting the drywall’s integrity.
Additionally, employing the correct tools and materials for cleaning, leveling, and priming can significantly impact the outcome of your tiling project. A systematic approach to surface preparation, involving diligent cleaning, thorough leveling, and appropriate priming, lays a strong foundation for the tiles to adhere correctly and endure the test of time.
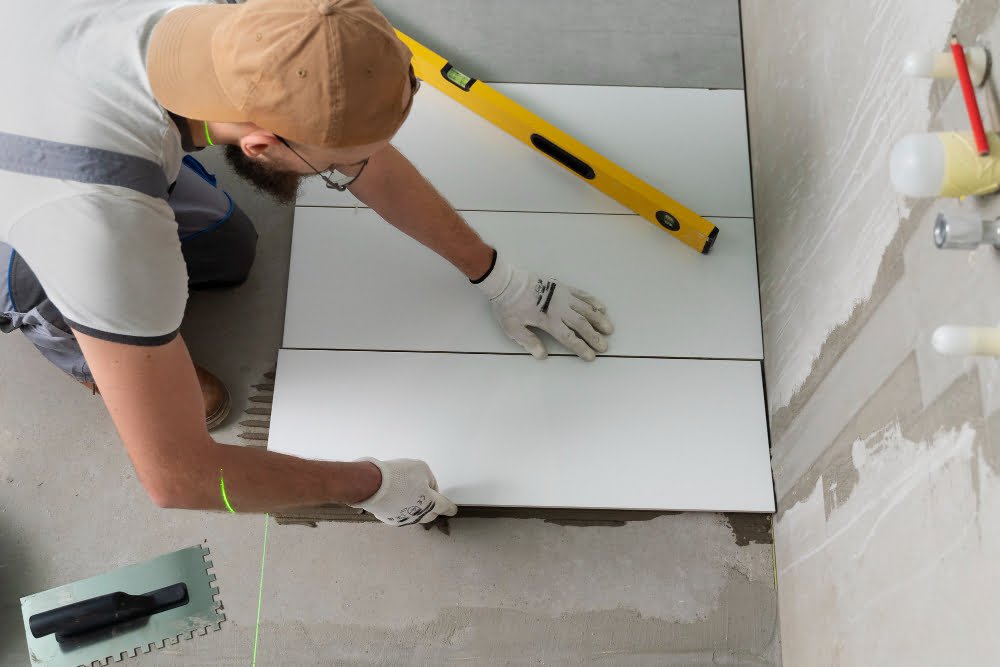
Improper Tile Placement and Grouting
One of the most common mistakes in tiling is improper tile placement, where issues like incorrect spacing, uneven tiles, and poor alignment frequently occur. These errors can lead to an unattractive and less durable finish. It’s crucial to use spacers and the appropriate tools to ensure an even layout. Tile spacers help maintain a consistent gap between tiles, which is essential for a professional-looking result. A leveling system can also be invaluable in preventing uneven tiles, known as “lippage.” This ensures that each tile is flush with its neighbors, creating a smooth surface.
Another critical step is planning the layout before applying any adhesive. Visualize the final look and make any necessary adjustments to the placement of tiles beforehand. This practice minimizes cutting and leads to a more symmetrical appearance. Always double-check measurements and alignment as you lay each tile, using a spirit level for precision.
Grouting mistakes are equally common and can significantly impact the longevity and appearance of your tiling project. Selecting the wrong type of grout for your specific tiles and environment is a prevalent issue. For instance, sanded grout is suitable for larger gaps, while unsanded grout works better for smaller ones. Once you’ve chosen the right grout, application is key. Apply grout evenly across the tiled surface using a rubber float, holding it at a 45-degree angle to effectively push the grout into the gaps.
Incomplete grout application is another frequent mistake. Make sure all gaps are filled adequately to avoid weak spots. After the grout has set slightly, usually within 10 to 15 minutes, wipe away excess grout using a damp sponge. Be careful not to disturb the grout lines. Finally, sealing the grout is an often-neglected step but is essential for protecting it against moisture, stains, and mold. Apply a quality grout sealer after the grout has fully cured, following the manufacturer’s instructions for optimal results.
